

How To Draw Closed Eyes From The Side
How to describe Airtight Eyes by pencil for beginners
How to draw Airtight Eyes past pencil with this how-to video and step-by-step drawing instructions. Pencil cartoon tutorial for beginners and everyone.
Please meet the drawing tutorial in the video below
Video produced by channel: Farjana Drawing Academy
You can refer to the simple stride-past-step drawing guide beneath
Step 1: Decide middle size
Determine the size yous want for one eye and utilise 2 markers to marker the purlieus for that eye.
Use a ruler to draw a horizontal line through the markers and to the right of the page.
Then mensurate the offset space and multiply it by 3. At present you lot will end upwards with 3 equal spaces passing through your sketchbook horizontally.
Step ii: Draw a circle
Depict a circle for each eye. Brand certain each circle fits within the boundaries.
Step iii: Determine the bending for each eye
Determine the angle yous want the eye to tilt and draw a line through each circle, making certain the angles are the same. Sentinel the video for tips on how yous tin can do this.
Step 4: Draw the center shape
Draw the inside and exterior corners of each eye where the diagonal line intersects the circle. The inner corner of each eye must be deeper and darker than the outer corner or the outer corner of the heart.
As you draw the tail pucker, allow your lines to gradually become lighter instead of having a hard edge.
Finally, draw a fix of curves to form the eyelids.
Pace 5: Draw a shape for each eyebrow
Use my shadow liner technique to draw a set of eyebrows. I similar to describe eyebrows simply in a higher place the circle and slightly wider than each eye. In the video, I prove y'all a technique to make the eyebrows fit together likewise as where to depict the arc.
We detail the eyebrows afterwards. Let Tornado move to the next stride!
Pace vi: Create a shadow
Before you color, make sure that the guides yous drew from steps 1-3 testify merely a footling bit. You can employ a kneading eraser to coil a layer of graphite out of those areas.
Let'southward beginning by shading the upper eyelid. Use the side of your pencil to paint a shape similar to an almond. The circle effectually each eye can help y'all see if your shadow on the right eye is similar to the left centre.
If you want to draw details such as shadows under heart bags, you can use circles every bit guides. See the video for an example.
Add some lite shadows to the bridge of the nose.
When you're done, delete what's left of each circle.
Footstep seven: Blur the residual of the face
Shading the residual of the face. You tin use these 2 tutorials to learn more nigh shading:
Step 8: Draw the eyebrows
Here, I switched to 4B 0.5mm lead. Starting at the bottom of each eyebrow, describe the line up. Be certain to lift your pencil upward to the end of each stroke to brand the hair await more than realistic. For a super detailed guide on this, encounter this tutorial.
At the top of each eyebrow, draw the line downward. Add some hair down the middle if information technology still looks bare.
This stride is subtle, but also very important. Use an HB pencil to apply directly below each eyebrow. Make sure the transition is gradual. Now the eyebrows look like they vest, instead of just pasting on the peel.
Step 9: Add together wrinkles to the eyelids
This pace is optional, merely it's fun, so why not do it?
This is more of a wrinkle than a wrinkle. When the optics are open, a pucker forms on the eyelids. Utilise pencil H and the lightest pressure to draw two folds. The darker yous paint them, the deeper they will announced.
Draw a line of diagonal lines along the edges of each eyelid. This area of the skin is very thin – wrinkles when the pare is pulled violently. You also desire to use an H pencil for this.
Depending on where the calorie-free is coming from your drawing, blend the opposite side of each diagonal line drawn. For instance, in this drawing, lite comes from above, so each side of each contraction opposite the light volition exist left lone, while the contrary side of the light will demand to be blended. .
Unless you are drawing it on a big calibration, avert using a tree stump as the head volition not be thin enough for this chore. Instead, utilise H and HB pencils to create a beautiful slope forth each contraction.
Using a kneading tool, go through the areas of each wrinkle facing light and gently dab with the pinched end of your molding tool to elevator a thin line of graphite. Highlights will appear brighter and wrinkles will become clearer and more than shaped.
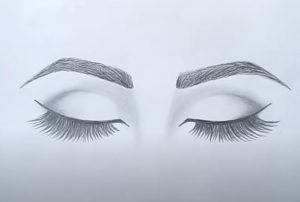
Pace 10: Depict eyelashes
To begin, draw three eyelashes for each eye. 1 on the left, far on the right and one in the center. The eyelashes should fan out, deviate from each other.
If you want to be really conscientious, lightly lash with an H or HB pencil to become started. In one case y'all are okay with the position, curvature and length, etc., overcome it with a darker pencil like 4B. Here, I used a 4mm 0.5B pb.
Take your time to make full the space in between.
It'south okay that some eyelashes touch. It actually looks more natural when they form triangles or even intersect.
How to draw closed optics Finally, use an HB or 2B pencil to paint directly under the upper eyelid to create a soft shadow that comes from the eyelashes.

Source: https://htdraw.com/how-to-draw-closed-eyes-by-pencil-for-beginners/
Posted by: holleyseentrusels.blogspot.com
0 Response to "How To Draw Closed Eyes From The Side"
Post a Comment